Portland Guitar Co. | Portland Oregon | Contact Jay Dickinson-503.245.3276 | jay@portlandguitar.com
Portland Guitar Pretty Good Intonation (PGPG) System
Finished Build
Orchestral Model
OM 2.13.60
- Body: Cocobolo
- Top: Adirondack Spruce
- Neck: Honduran Mahogany
- Binding: Macassar Ebony
Page 2
 ( 022 ) 3-April-2014
In this picture I am getting ready to bend the side blanks into shape. The method that I use involves heating the side blank in a heating blanket and pressing it into shape in a bending machine. In this picture I have laid one of the pieces on the heat blanket which is inside a set of aluminum flashing.
 ( 023 ) 3-April-2014
Then I lay another piece of flashing on top of the side blank and then a 12 mil thick sheet of spring steel. The spring steel limits the bend angle thereby preventing the the wood from cracking should there be a weak spot. This is more of a problem in highly figured wood such as flamed maple. To hold the heating assembly together I use a set of clothes pins.
 ( 024 ) 3-April-2014
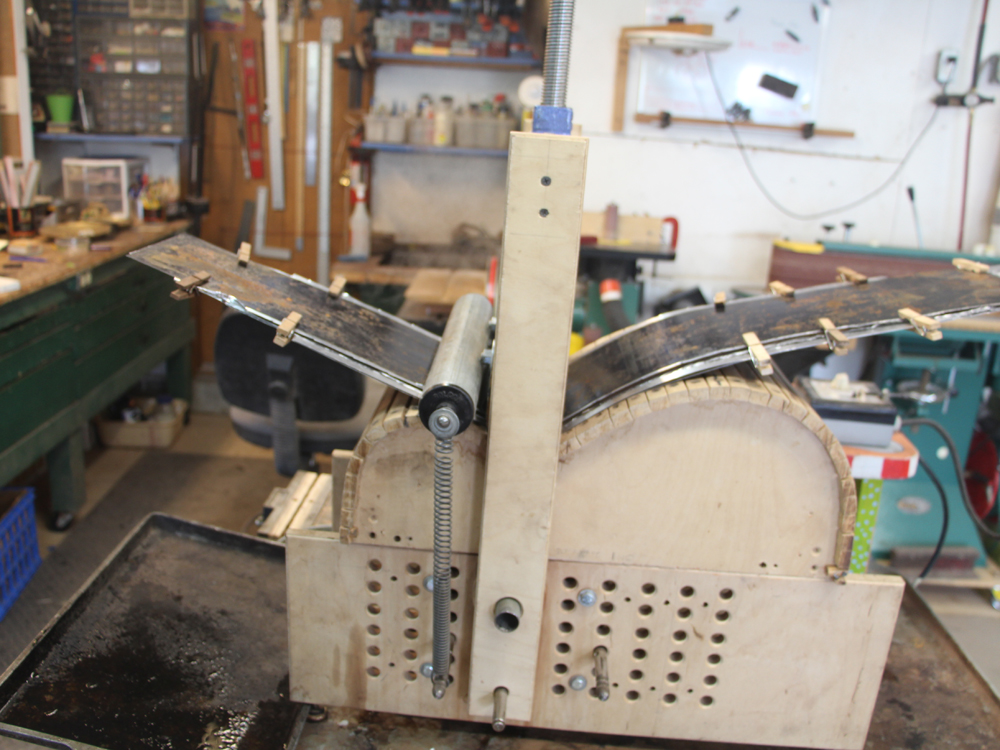
Now I put the assembly in the bending machine, lining up the waist under the vertical press. I turn the heater up to maximum, squirt water in through the space between the flashing, and then let it cook for about fifteen minutes. When the wood gets hot it becomes quite flexible. The water limits the maximum temperature to the boiling point, ~212 deg F preventing the wood from scorching, helps to conduct heat, and acts as a lubricant.
 ( 025 ) 3-April-2014
After I am confident the wood is flexible I press the waist into place.
 ( 026 ) 3-April-2014
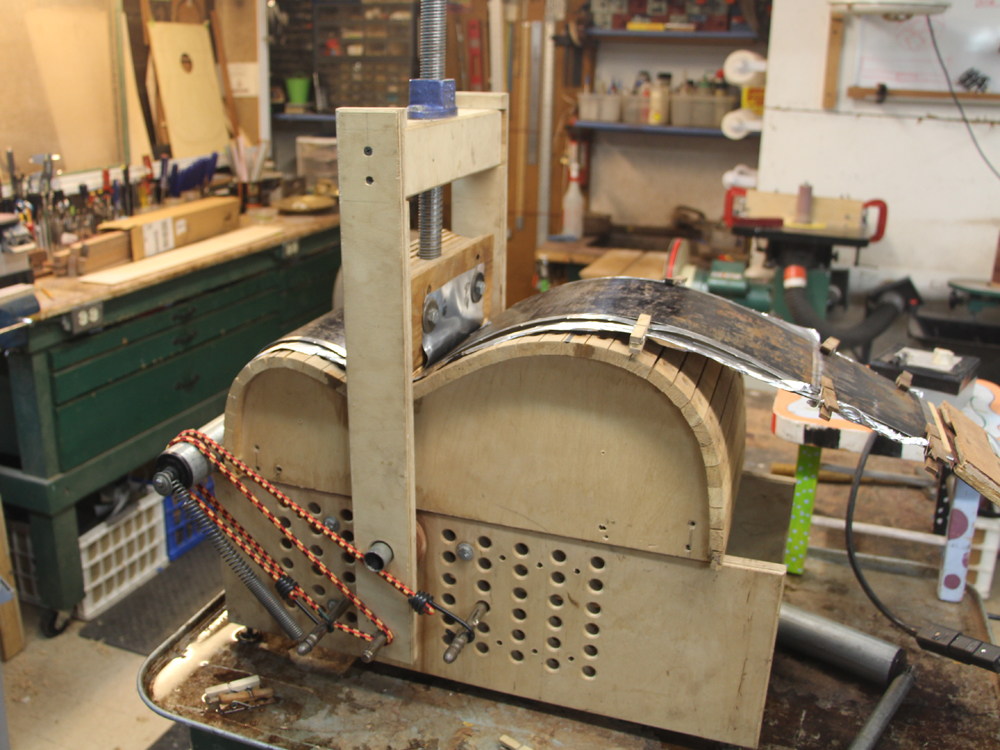
I then add the upper bout roller.
 ( 027 ) 3-April-2014
And roll the upper bout into place.
 ( 028 ) 3-April-2014
Then add the lower bout roller.
 ( 029 ) 3-April-2014
And roll the lower bout into place. Then I reduce the heater to below the scorching temperature and let it cook for half an hour.
 ( 030 ) 3-April-2014
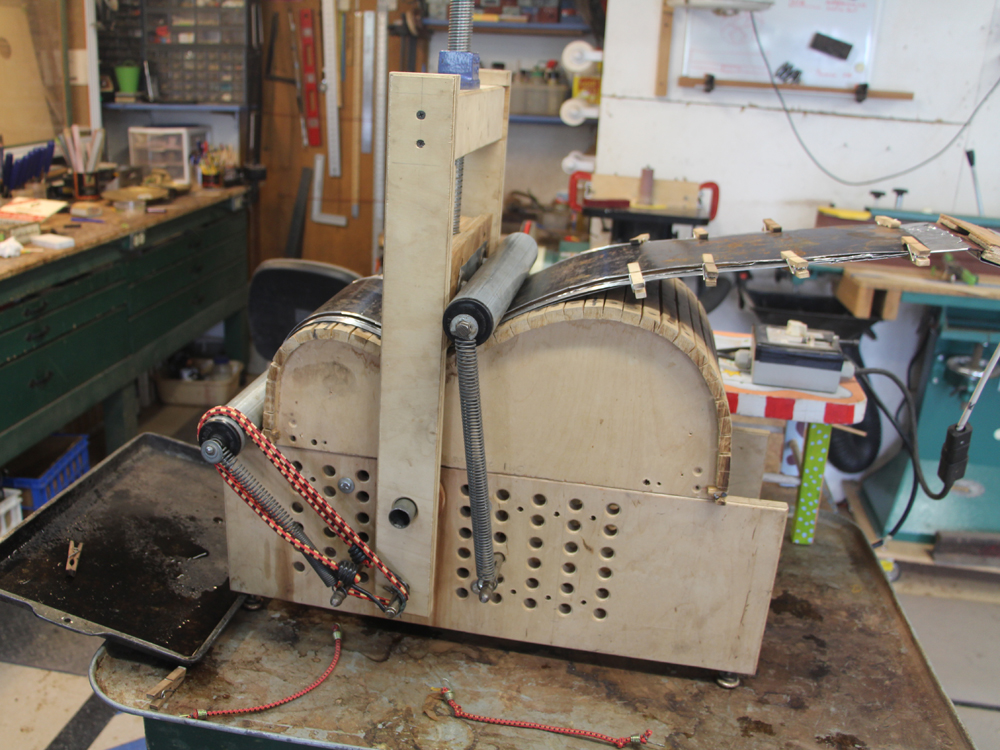
Then I remove the top layers of the heating assembly so the wood can dry out effectively and continue to cook the wood until it will hold its shape.
 ( 031 ) 3-April-2014
After an hour or so the bent side blank comes out of the machine and we have a funny shaped piece of wood.
 ( 032 ) 3-April-2014
I put it into the side form until I am ready for the next step.
 ( 033 ) 3-April-2014
In this picture I am drawing the outline of the sides onto the side blank.
 ( 034 ) 3-April-2014
And then using a raised platen I use my bandsaw to cut out the side.
 ( 035 ) 3-April-2014
 ( 036 ) 3-April-2014
In this picture I am using the bending machine again to bend the kerfing into shape. I use a reverse kerfing method, which means that the kerfing slots are placed on the inside next to the sides and the solid strip goes on the outside. This method results in a gunnel like assembly that is very stiff and strong.
 ( 037 ) 3-April-2014
Cocobolo has a lot of oil that can cause issues with the glue. So, to improve the adhesion, I deplete the surface layer of oil with a swipe of acetone.
 ( 038 ) 3-April-2014
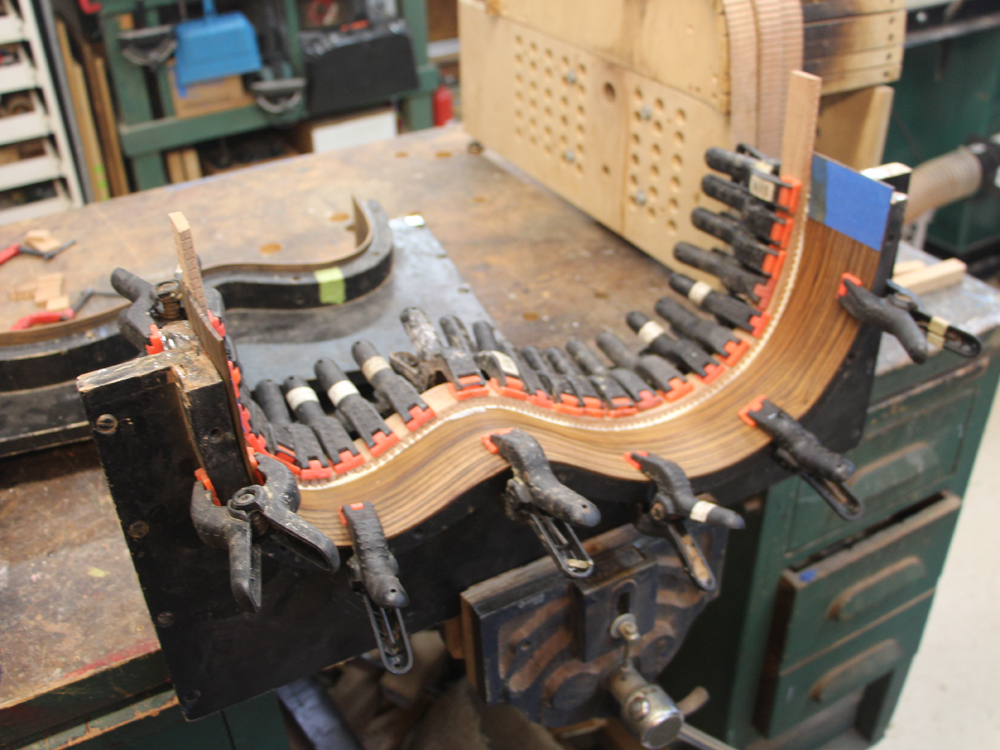
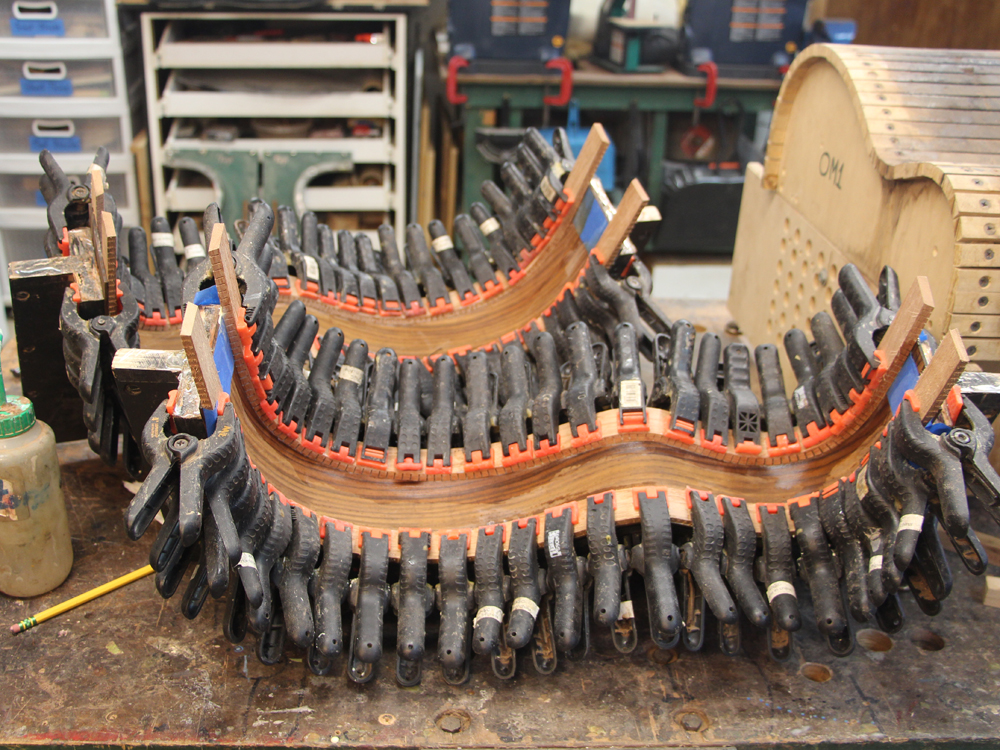
After applying a liberal amount of glue to the kerfing I glue it to the interior of the side blank. When the side blank is shaped in the bending machine it is close to the final shape, but not perfect. The method I use to glue the kerfing in place accomplishes two functions. First, the clamps, ~50 in total, firmly press the side blank into the form, which I spent a lot of time long ago making sure it has the right shape. At the same time the clamps press the kerfing strip firmly in place. So, as long as the form has the right shape, the final shape of the side will have the right shape.
 ( 039 ) 3-April-2014
The top and bottom kerfing strips get glued in at the same time. Did I mention, I have lots and lots of clamps.
 ( 040 ) 3-April-2014
Before the glue sets up I clean off the squeeze out and excess glue and then blow out the glue in the kerf slots.
 ( 041 ) 3-April-2014
Here are both sides waiting for the glue to set... usually over night.
 ( 042 ) 3-April-2014
Are after the glue has set. With the reverse kerfing, these sides are very stiff and strong.
 ( 043 ) 3-April-2014
I strive to make the inside of my guitars as beautiful as possible. This is a good time to put a new surface on the inside; here I am using a pneumatic drum sander to clean up the kerfing. The exposed Cocobolo gets a bit of handsanding.
 ( 044 ) 3-April-2014
After putting the sides back into their form, I use as hand saw to trim off the ends. The end of the form tells me exactly where to cut. The form methods I use takes a lot of the guess work out of the process, I think.
There are a zillion ways to build a guitar and as far as I can tell there is no "Right" way to do it. If you ask five luthiers a question you will get seven answers.
 ( 045 ) 3-April-2014
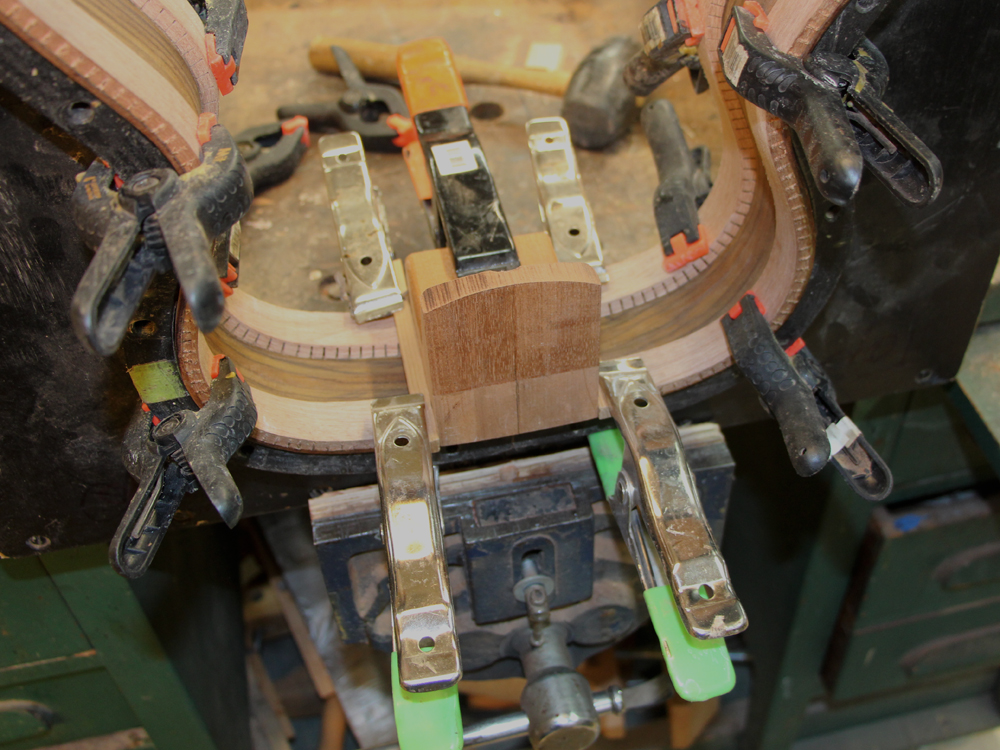
I use a template method to shape the heel block to the shape of the sides. The rail in front of the disk limits how far I can push the white template toward the disk. The heel block is attached to the template with a bi of overhang, so when the heel block is finished sanding it will have the template shape, which is the shape of the guitar.
 ( 046 ) 3-April-2014
The tail block gets the same treatment.
 ( 047 ) 3-April-2014
Now I am going to use the heel block and the tail block to glue the two halves of the sides together. Here I have laid the heel block in the proper position and butted two guide rails up against it.
 ( 048 ) 3-April-2014
When I remove the heel block I can use the guide rails to cut a slot in the kerfing. The blue tape I put on the sides many steps ago will make it easy to remove the kerfing.
 ( 049 ) 3-April-2014
 ( 050 ) 3-April-2014
A bit of glue.
 ( 051 ) 3-April-2014
And I use a couple of clamps to press the heel block into place.
 ( 052 ) 3-April-2014
The tail block get the same treatment and the set up over night.
 ( 053 ) 3-April-2014
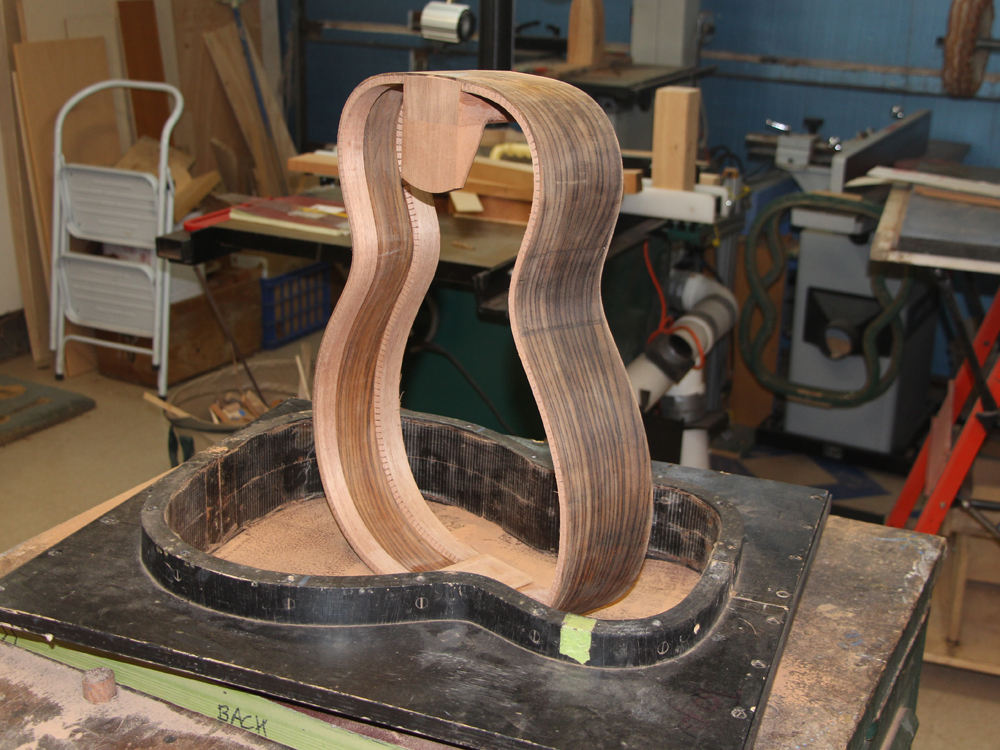
The next morning and I crack the form ,
Ta Da!... Guitar Geist!... Lukalikagtr.
From now on we'll call this the rim.
 ( 054 ) 3-April-2014
Next, I use a sanding sheet on top of the top and back forms to sand the right shape onto the edges of the rim. I put a couple of weights on top to insure even pressure gets applied all the way around and the rim doesn't rock back and forth as I slavishly push is back an forth. I mark the edge of the rim all the way around, so when all of the mark is gone I know the rim will have the shape of the form, which is the shape of the top, or back.
 ( 055 ) 3-April-2014
Both edges get the same treatment.
Next up: The top and back.